Wondering how to set up your new Retail Grid? Look at the images below to see the simple instructions.
Need some help? Scroll down and watch our assembly video.
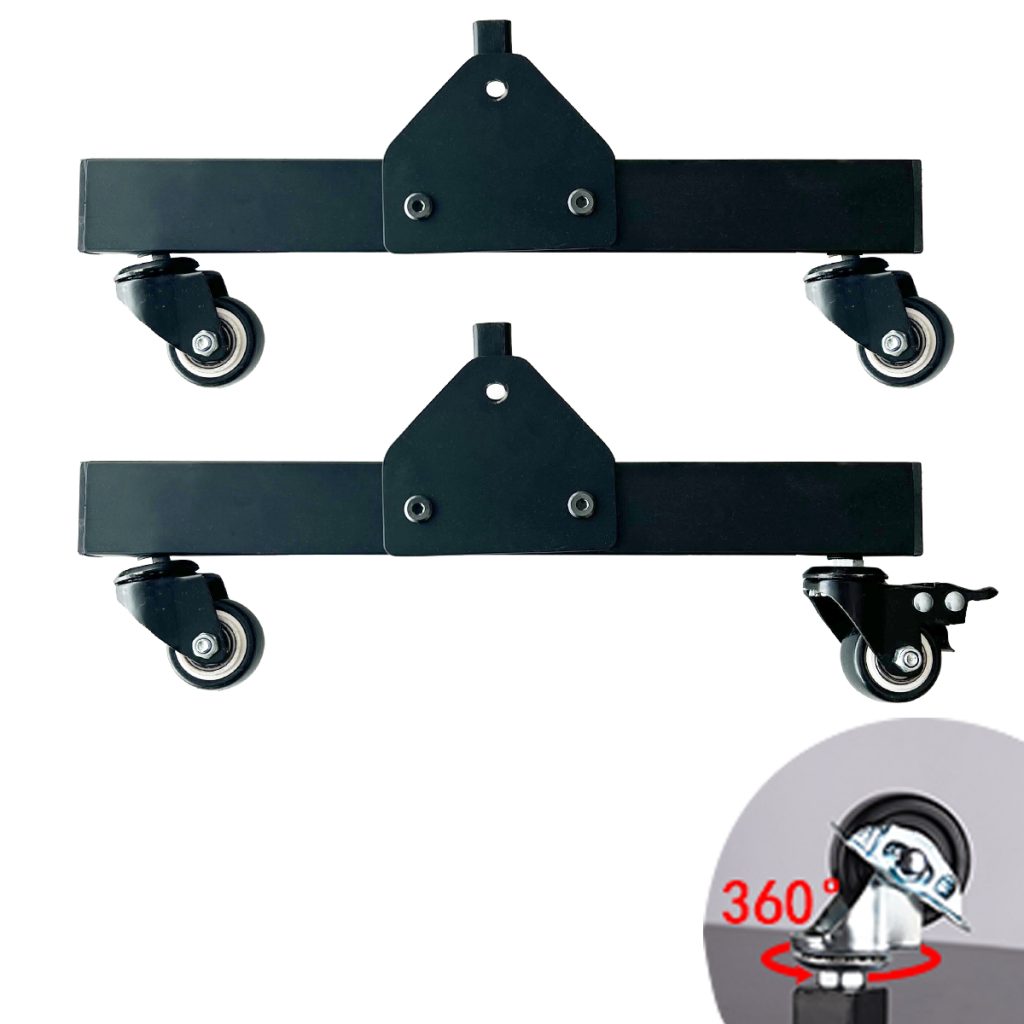
Step 1: Attach the wheels to the legs by twisting them into place. Ensure one leg in each pair has a brake while the other does not, and make sure the brakes on both wheels in each pair are aligned on the same side.
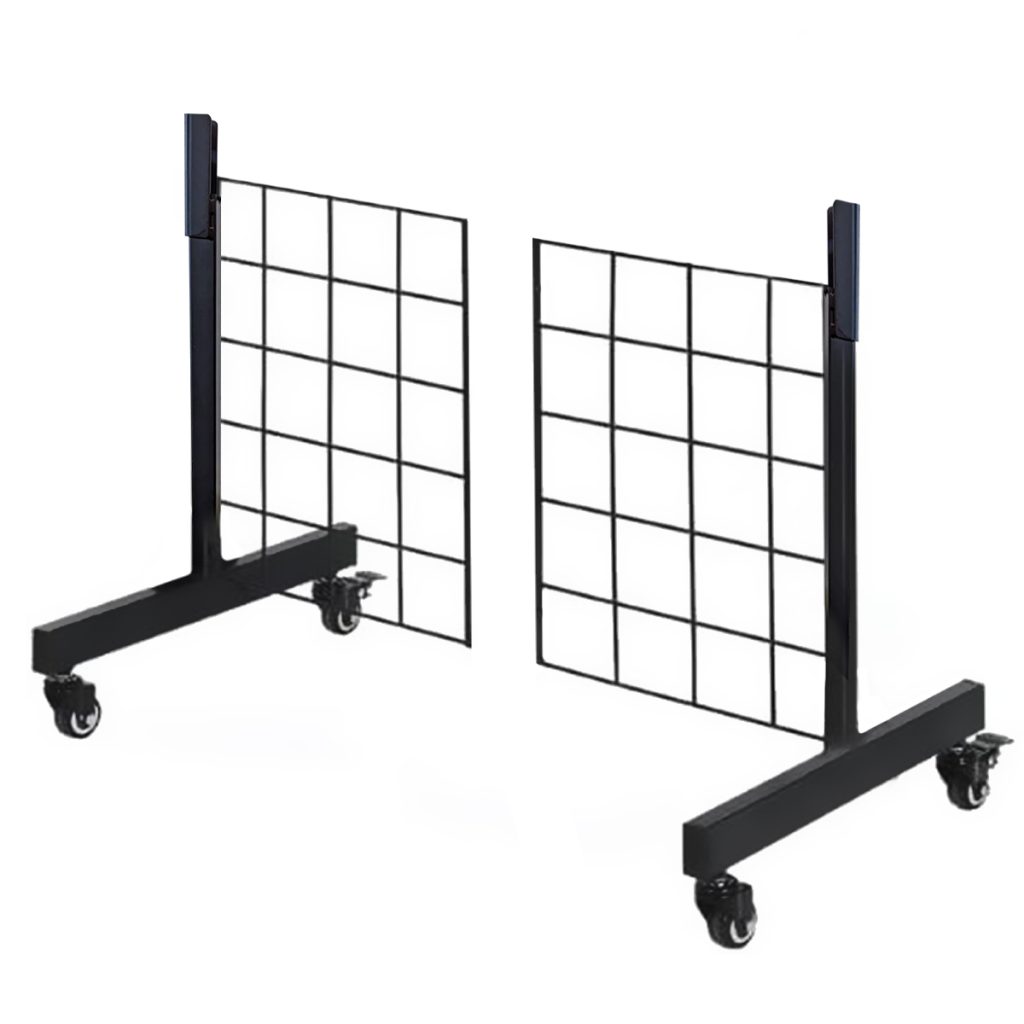
Step 2: Insert the bottom two panels into the legs. Please pay attention to the installation direction of the two panels as shown in the picture.
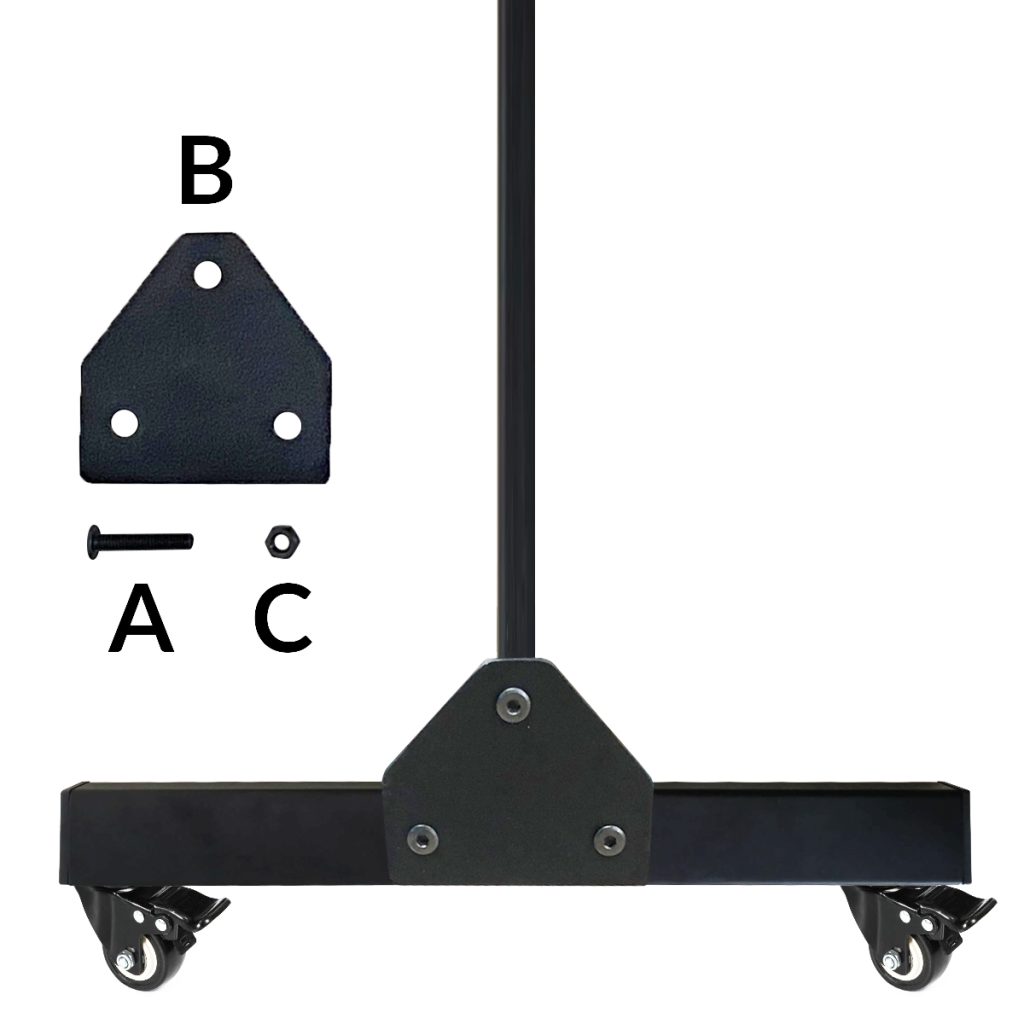
Step 3: Secure the legs and the panels with the triangular-connectors and bolts. (A*3, B*1, C*3)
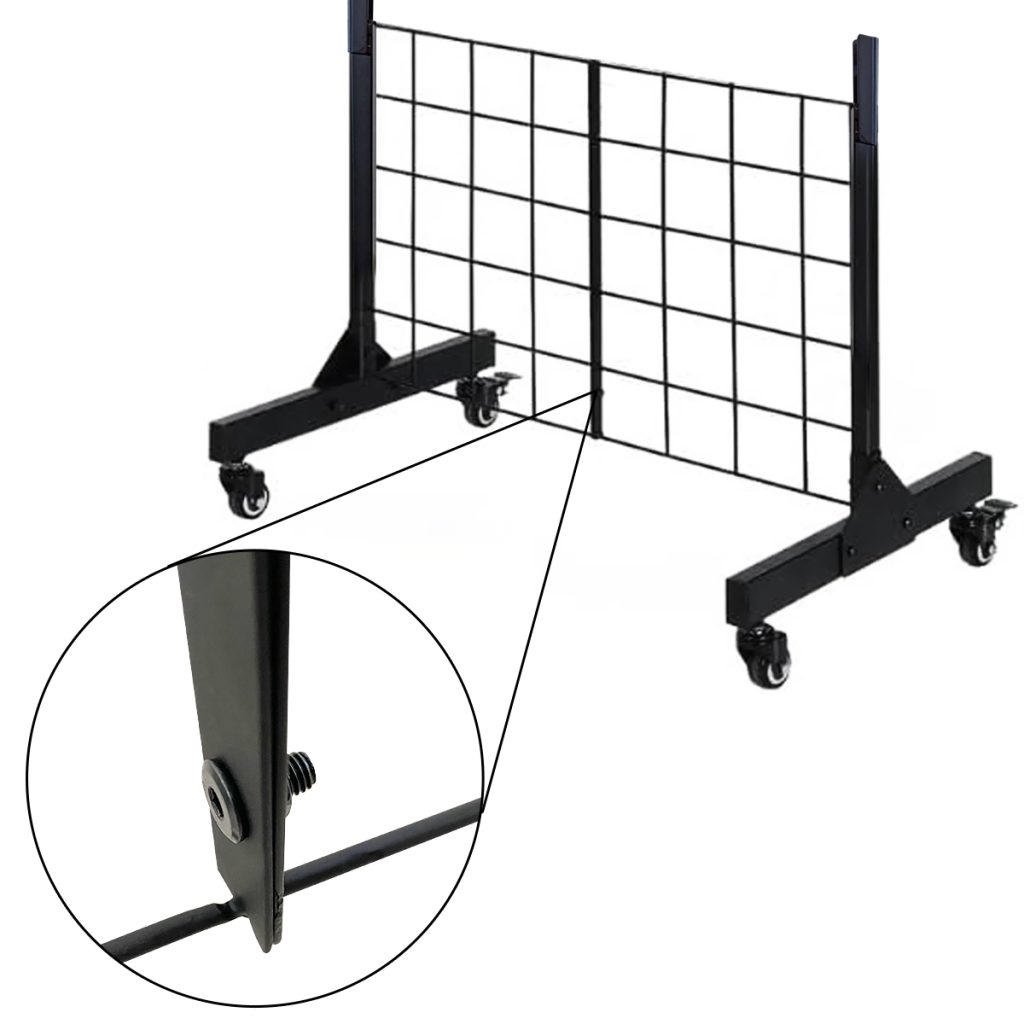
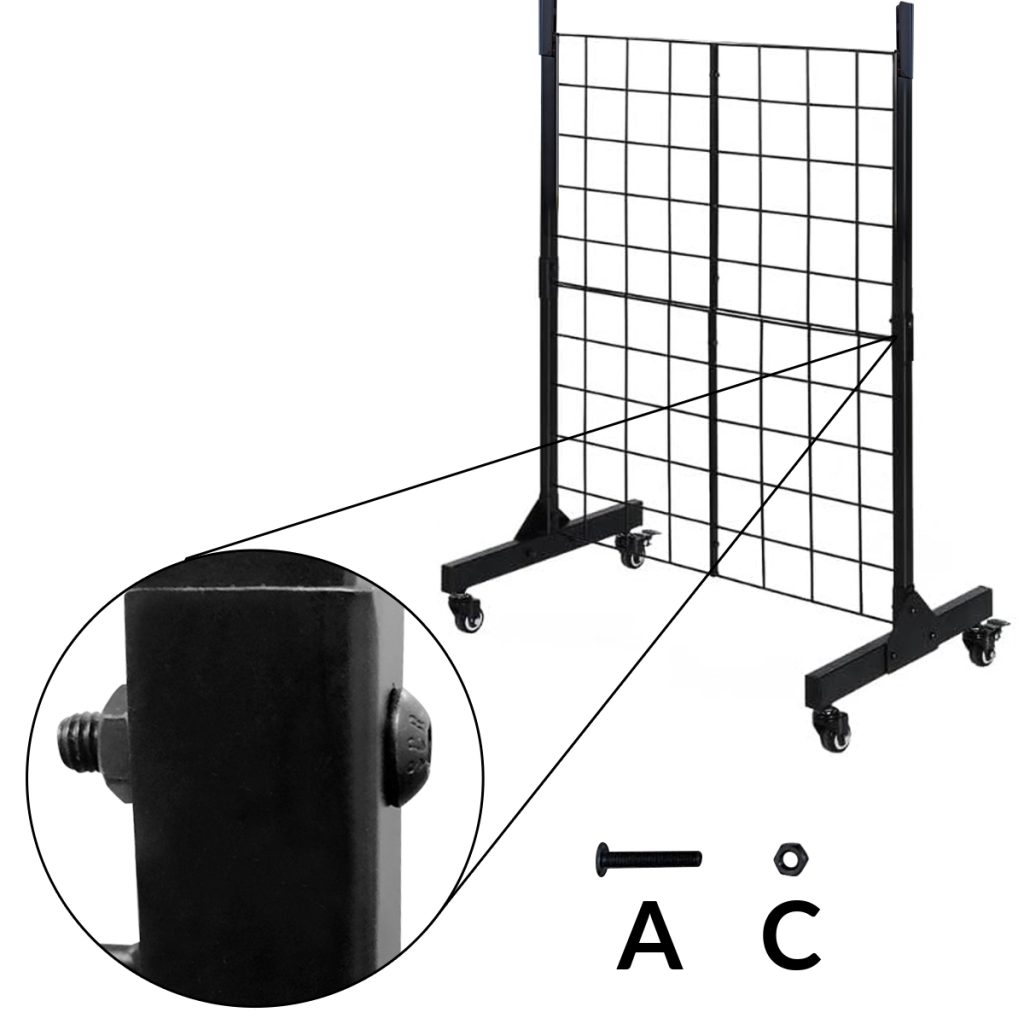
Step 4: Insert a bolt through the lowest holes in the middle of the panels. Please refer to the picture below and note the direction of the bolt.
Step 5: Insert the next panel and tighten it with the bolts on the sides. Please note that the bolts should be tightened from the outside towards the inside.
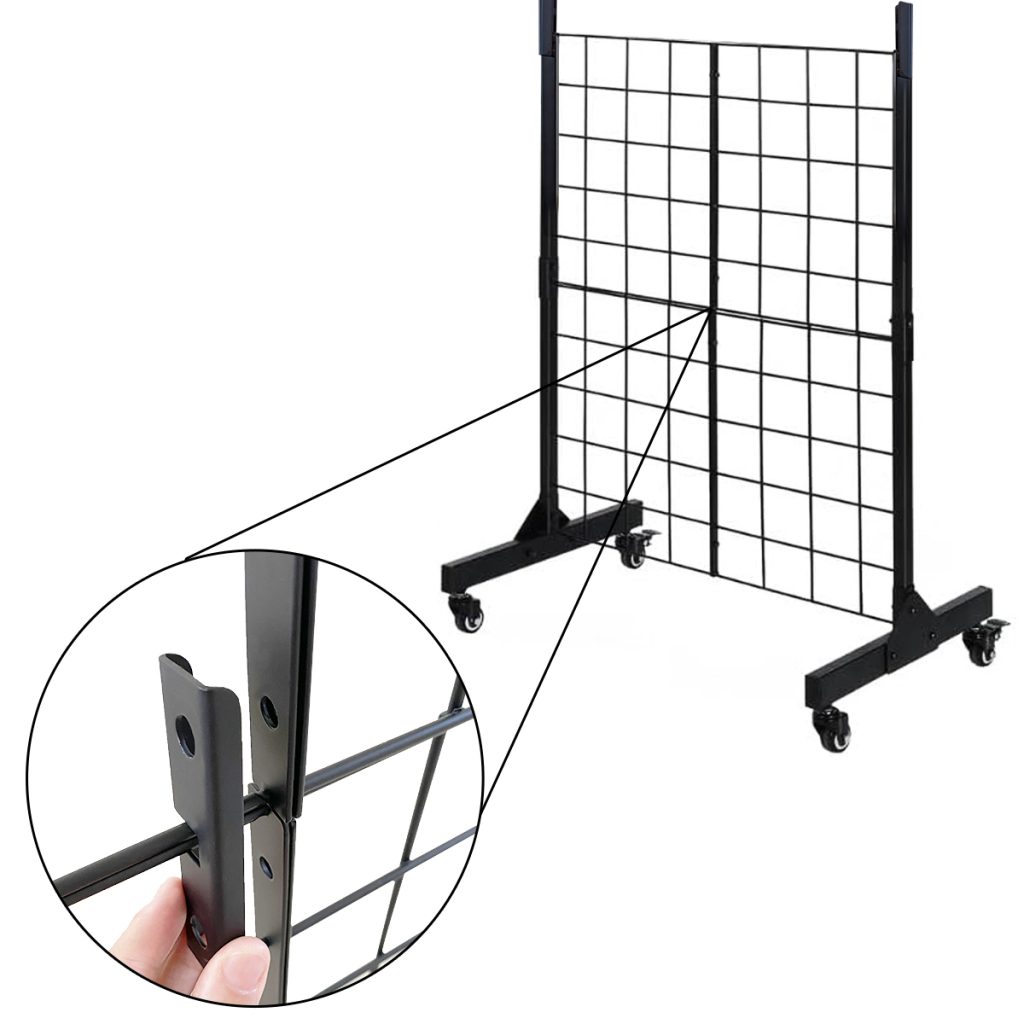
Step 6: Align the middle sections of the panels by adding a rectangular-connector. Please ensure the installation direction of the rectangular-connector matches the picture.
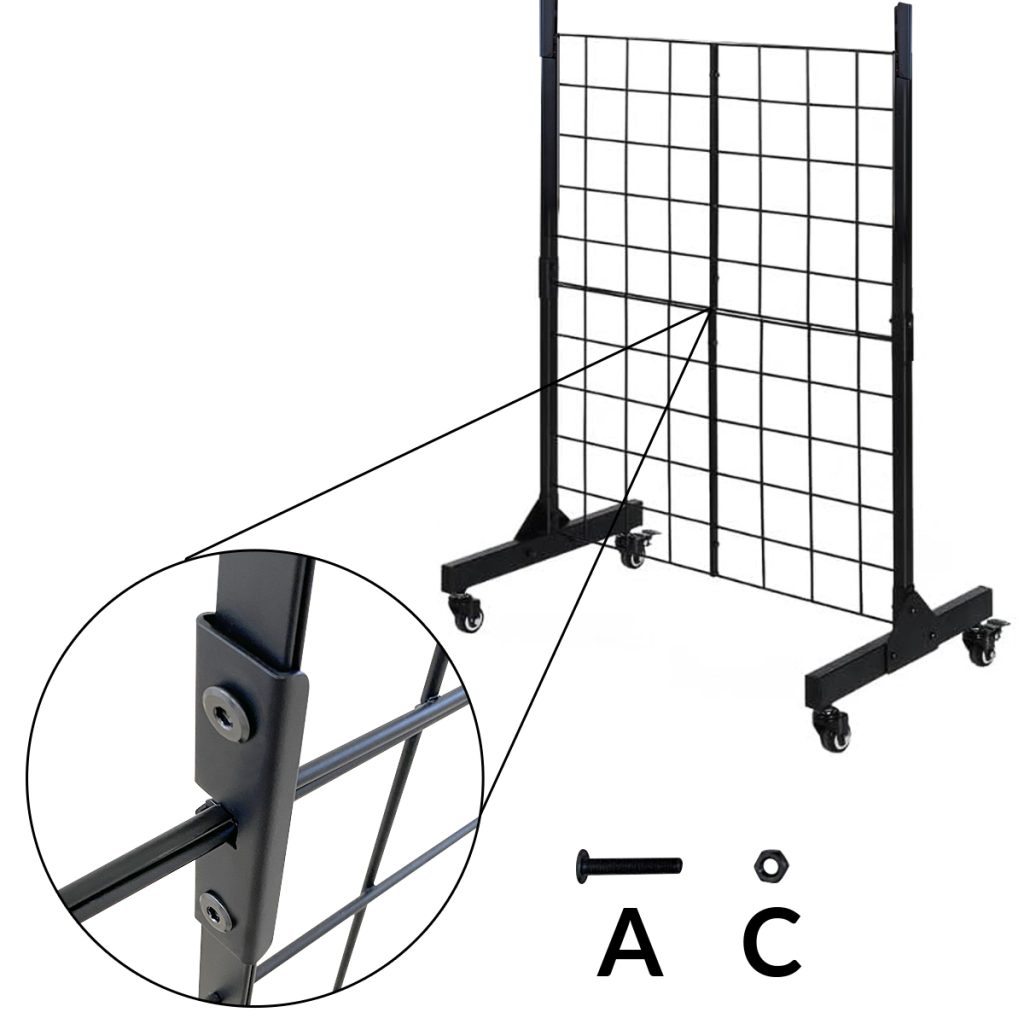
Step 7: Tighten the parts from the previous step with the bolts.”
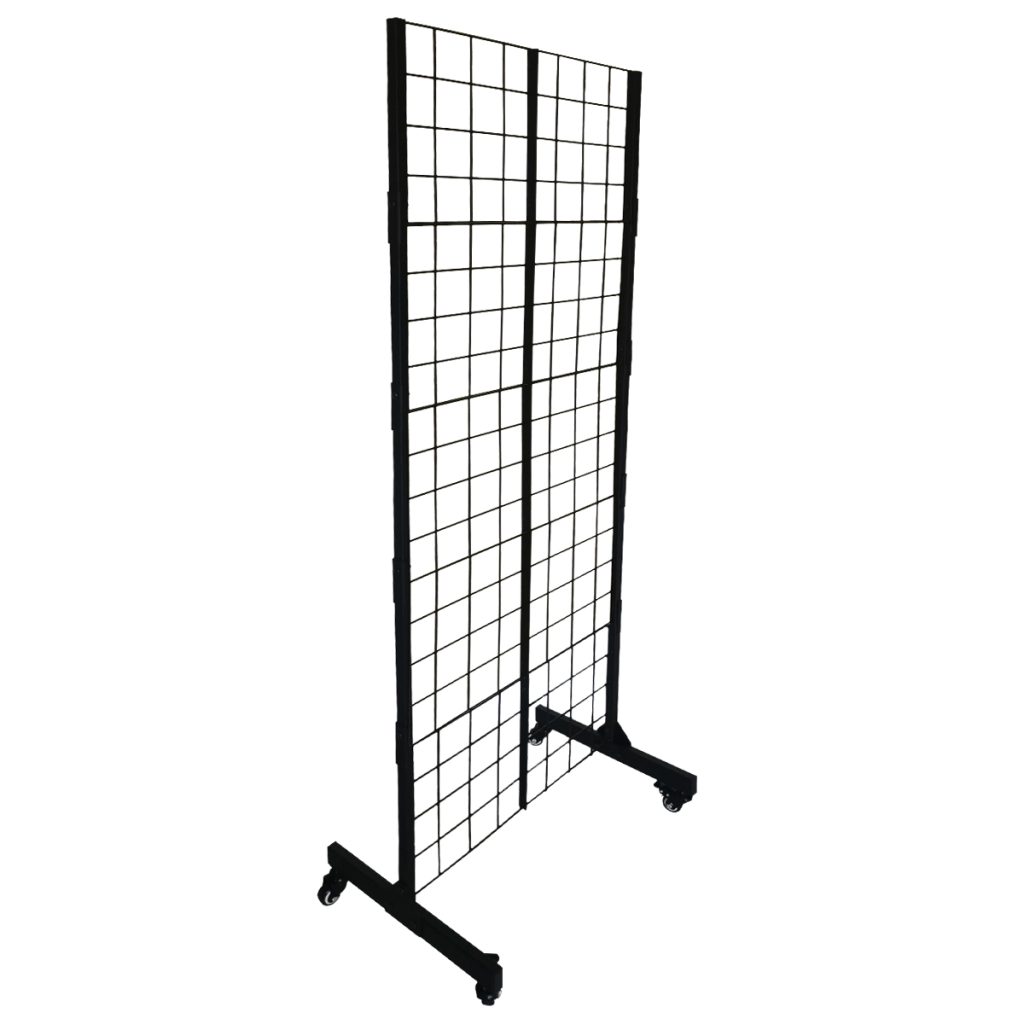
Step 8: Repeat the process until the last panels are secured!